After researching at the Globe’s archives and costume department to see the traditional way in which the costumes were made, I have tried to create my own costume in a similar way, trying to use original ways in which the clothes were put together. I am attempting to use points to attach the various items of clothing together, such as the hose attached to the doublet, and the sleeves attached to the doublet also via a collection of points, tied together, therefore the sleeves would be detachable – in the style of the period. This would be done, as in the period people generally wore their wealth, as there were no real banks for people to contain their money. Their wealth would be in their belongings and their clothes. So should someone be short of money, they would sell items of clothing – such as their sleeves – to earn some money.
The original pattern I made was based off the pattern printed in Historical Costumes and How to Make them, it was very useful in giving me the basic shapes I needed, and included patterns for a doublet, hose, sleeves and a cape. I adapted the patterns slightly, such as the hose in the book were specifically Venetian hose, which, after the research I did pertaining to the type of clothes young men such as Samuel Daniel might have worn was not suitable. So I adapted the pattern into making a pair of French hose with added cannions instead. Similarly, the style of sleeves in the book were for the larger, more pronounced and stuffed sleeves of the earlier period of the middle 1500s, whereas Samuel Daniel’s style of clothing is based more on the early 1600-style of clothing, in which the sleeves were significantly less stuffed and were much tighter on the arms, and around the wrists.
I started work on the doublet first; I had managed to come across a lucky find in a charity shop of finding an old bed linen set of the colour and pattern-style I wanted for Samuel’s doublet. It was 100% cotton and perfect for what I needed. In my design, the doublet is an orange colour, trying to bring out the bright, youthful colours gentlemen of the period might have worn. I was hoping to find something with a matching pattern so it would look detailed and to the period, rather than having to make a pattern entirely from slashing the doublet in the style of the Romeo doublet at in the Globe’s costume archives. (The black doublet with pink slashings). Thankfully, the fabric I found had an interesting mix of oranges, yellows and terracotta’s which suited the style I wanted, and so I felt that was all that was needed. I tried to keep in style with the Globe’s way of making doublets, it was my first attempt at using quilting for the inner-lining of the doublet. All doublets were generally lined with quilting, due to the nature of the British weather being significantly colder than what it is today – of course, should the weather ever have gotten too hot, again, points could be used to remove one’s sleeves, and make the outfit a lot cooler.
While researching at the Globe I also took note of the shoulder-arches on most doublets, used to define the shoulders, I made a pair of these out of the same bed-linen material, while using the lining of the bed linen as lining for the shoulder arches themselves. They are stuffed with wadding to give them the particular pronounced look of the period. As luck would have it, after I raided my gran’s sewing box for anything that could be useful to me, I came across some spare material which I believe might have been used to upholster an armchair. The material was a dark orange/brown colour, and had a rather ‘nubbly’-texture to it, which I felt was quite suitable for the period I was aiming for with my doublet. So along the edge of the shoulder-arches I have piped the material to again, give it a more defined quality.
I used the same upholstery material to make the collar for the doublet, the darker colour offsetting the lighter yellow of the pattern on the doublet very nicely. I felt the colours all easily complimented each other, and gave the doublet an almost continental look, with all the oranges, yellows and terracotta’s. However, in the design I wanted to make a stark contrast between colours, by using bright blue against orange. Clothing of the period was particularly bold and colours were often mixed and matched as people were far braver in trying out colour combinations which might not fully mix such as blues mixed with green and green and pink and so on. So to try and recreate this bravery with colours that people had of the time, I needed a good blue to offset with the oranges of the doublet. I had come across a lovely turquoise inkle braid which I have used as a trim on the edging of the entirety of the doublet. It is a different colour blue to that of the hose, but the fact that there is blue still included creates – I believe – a good balance between both matching the rest of the outfit, and also creating the stark contrast with the rest of it.
Unfortunately no matter how hard I tried I could not find any suitable buttons to be used that were the same as the sort I found up at the Globe. The buttons there were round wooden buttons that had then been covered with silk thread to match the doublet. I tried to find such round wooden buttons but to no avail, so I had to search for buttons which I felt would be just as suited to clothing of the period. I came across a collection of buttons that had the look of dark leather plaited together. Leather at the time was very easy to come by, and the pattern was simple, yet elegant and I felt it suited what I needed very well. Also, the darkness of the buttons I felt brought the doublet to life, considering the rest of the doublet colours are very light and bright. The button loops are simply plaited string sewn together.
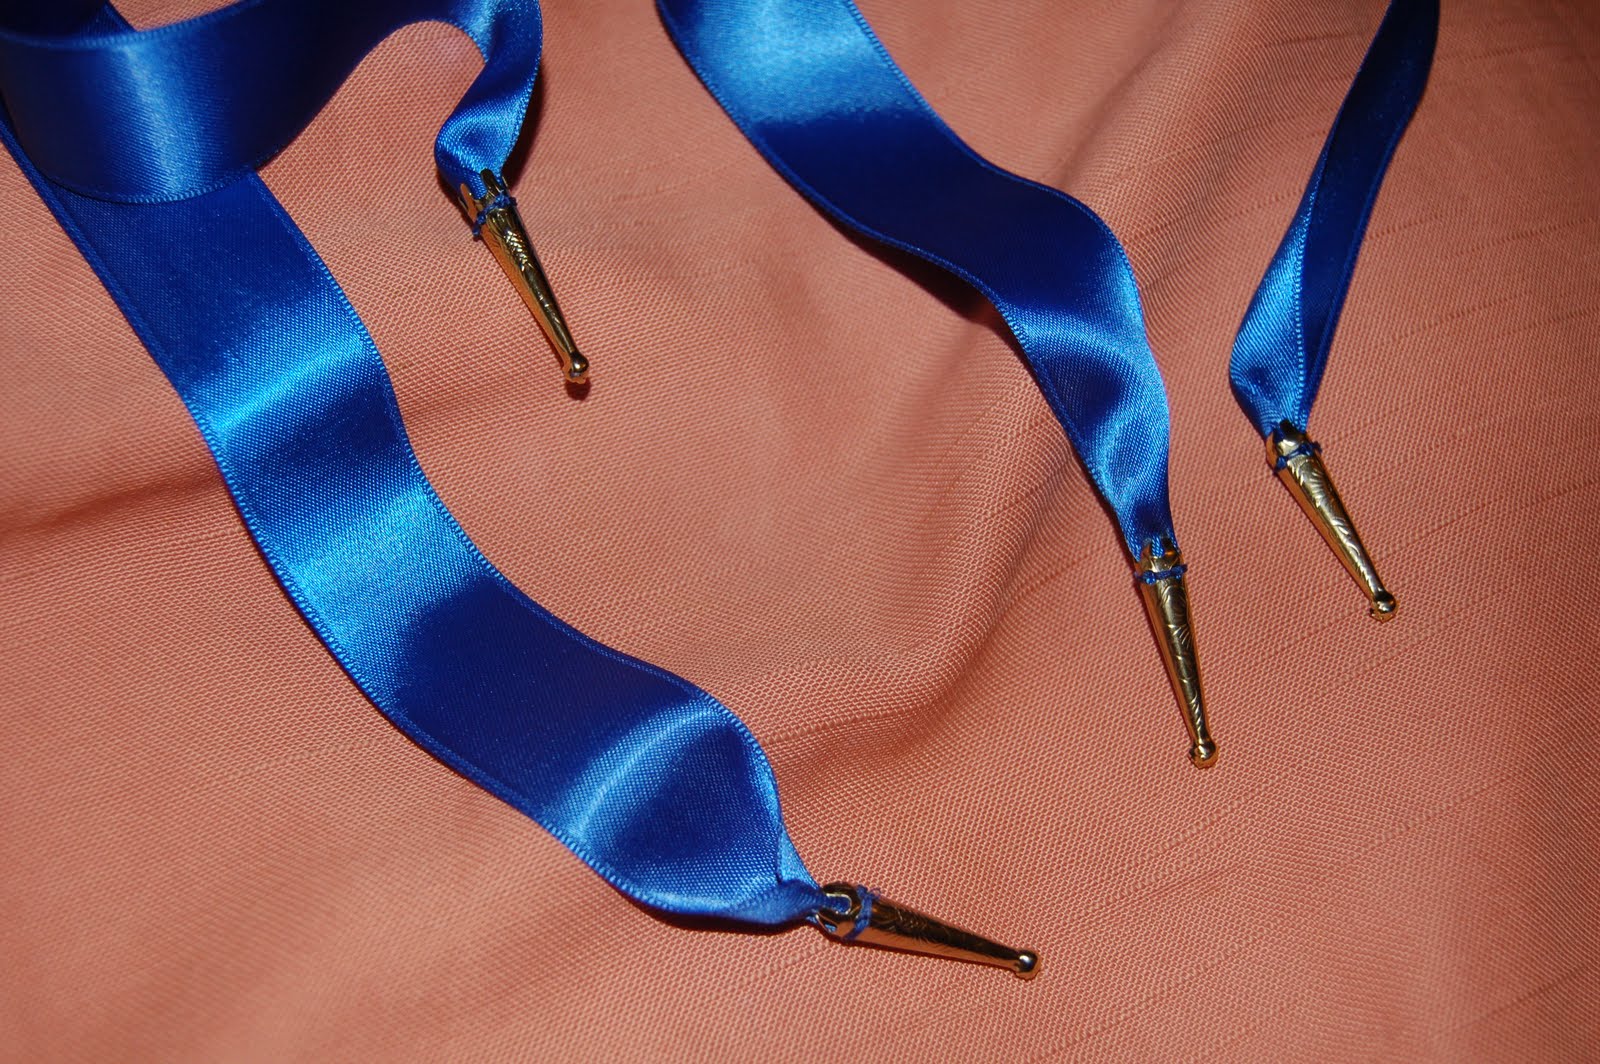
The Globe outfits had hand-stitched eyelets for which the points could be threaded through. These would be used to tie the various pieces of one’s outfit together, such as the doublet, hose and sleeves. (I unfortunately did not have enough time to put eyelets on the sleeves – but this will be rectified once I get the outfit back from assessment.) I did not have time to do my own hand-stitched eyelets, so instead I used grommets instead as a way of threading the points through. The points themselves are based off the points I saw used at the Globe. They are blue ribbon with metal corset nubs sewn onto the ends, which would then be threaded through the eyelets. [I need to sew a large collection of these to tie everything together.]
The sleeves are made of blue silk dupion with peach underlining and quilting for the lining. The blue is bright enough to make a stark contrast between the colours on the rest of the doublet, and matching the cannions on the hose. They are slashed so as to show the peach underlining, done in the style of the period and to match the rest of the doublet. Eyelets will be added around the edge of the upper sleeves to thread points through which would allow the sleeves to be attached to the doublet.
The hose were sewn from the pattern used in the book as before, though I shortened them somewhat so as to make them French Hose, which are considerably shorter than that of Venetian hose. They are made from gold silk dupion which shines blue in the light, the hose are stuffed with wadding to make them thick and stick out. The cannions are blue silk dupion with small slashes, stuffed with wadding with gold embroidery appliquéd on in a decorative manner. The lower britches are the underside of the fabric used for the doublet, a darker orange in colour with the yellow thread-swirls and patterns used on the underside to try and match the colours, but still have a bit of variety on par with the rest of the hose.